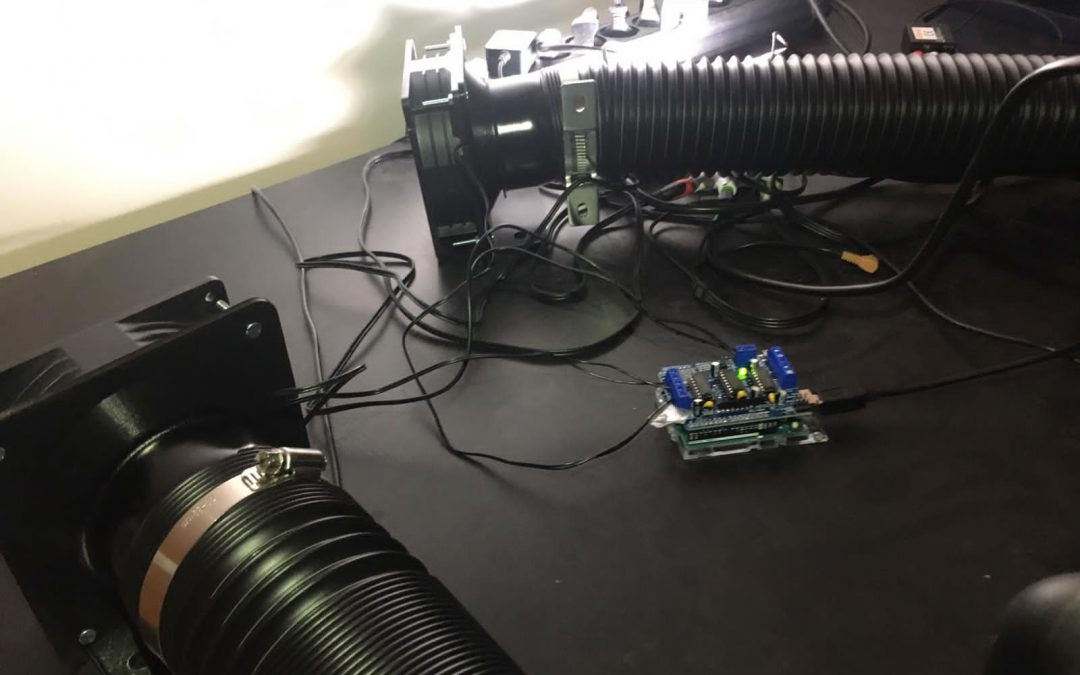
script type="text/javascript"> jQuery(document).ready(function(){ jQuery("article.et_pb_post").each(function(){ jQuery(">a:first-child, .et_pb_image_container", this).insertAfter(jQuery(".post-meta", this)); }); });
Select Page

Update dec 2022

Today (01-12-2022) I received a new Arduino MotorShield Rev3 as the old shield was having some trouble on the long ends and giving me stable wind. 

The new Motorshield is working better but can only handle 2 motors instead of 4. 

Config change

Made a new Sketch using SimHub and removed the VIN wire on the back of the board so it will use its dedicated powersupply instead of the powersupply from the Arduino.

Remove VIN

On the older Motorshields you have a jumper to tell the motorshield to use its own powersupply or from the attached Arduino. On the REV3 you dont have a jumper anymore. Turn the board up-side-down and there are 3 solder points with VIN Connect on the back. Above the text there are 2 square solder points and 1 round point. Use a small sharp knife to clear the wire between the square solderpoints. Yes i know it seems strange, but this is the way to go 🙂 

Sketch

  1. Open SimHub
  2. Create a new Sketch with SHAKEIT PWM Output (add it 2 times as you have 2 fans)
  3. Change the PIN output for motor 1 to 3 and for motor 2 to 11 (this is important!)
  4. Upload the sketch

Since 2019 I started to do some “simracing”. As a F1 fan i’m mostly racing on F1 2020, and last year the 2019 version. I have bought a setup with a custom wooden frame with a playseat mounted on it. It came with a Thrustmaster T300 setup but I changed it with a Fanatec Setup.


Basic Setup

  • Fanatec CSL DD wheelbase
  • Heusinkveld Sprint Pedals
  • Fanatec F1 2020 Limited Edition wheel
  • DIY Red Bull F1 wheel
  • DIY Bentley GT3 wheel

This in combination with a Game PC

Mods 1 – Bass Shaker

With 2 speakers mounted under the seat

Mods 2 – WindSim

Hardware we used:

As i had issues with the Adafruit v2.3 motorshield I ordered a 10 euro version from Aamazon and this gave me a working setup.

  1. Take the Arduino Uno and mount the Motorshield on top of it
  2. Remove the jumper from the Motorshield as we want to use the power source from the motorshield and let the Arduino use the power from the USB port. This could be different from the Adafruit setup!! 
  3. Strip the power-source cable and connect it through the Motorshield
  4. Strip the connector from the fan and connect the fan to the motorshield. Personally i had issues with motor 1 and motor 2 so i did use motor 3 and 4. I had to figure out the positive and negative wire, so check the connector and make sure to not mix up the wires while stripping them 😉
  5. When all is connected, power up the Arduino by connecting the USB to your PC
  6. Start SimHub and go to the Arduino tab, and use the Setup Tool to configure your Arduino and Motorshield.
  7. Give the Arduino a name like WINDSIM and then scroll down till you see your Motorshield and enable it. In the upper-right corner select your Arduino Uno and the COM port your arduino is connected to.
  8. Click on Upload Sketch to send the config to your Arduino. When done hit OK and close out.
  9. Go to ShakeIt tab on the left of the Arduino interface and enable the module Speed
  10. Now I did set the volume to 75% for the Speed module
  11. On top, go to Motor Output and open the Arduino Motor module. In the table look for Speed and enable Motor 3 and Motor 4 (or 1 and 2 depending on what motors you did connect)

Use the Test button to verify if your fans are speeding!

Setup Game(s)

Now we have the Hardware setup and running, we need to configure the game.

  1. In SimHub select the game en check the Port, for F1 2020 this will be 20777
  2. Check your IP address from the system running the game
  3. If you are using a different PC / Console with the game, then in-game setup the Telemetry with the corresponding IP address and port. If it is local you can launch the game from Simhub

Mods 3 – Hue Lighting

I have added 3 Hue Playbars to simulate the screen output. 

  1. Position the bars on the back of the screen
  2. Use the Hue App (iPhone) and configure it using the Entertainment Room
  3. Install the Hue App on thePC and select Game
  4. Enjoy the lights 🙂